How to Mount Your Phone for Optimal Tracking
A single standard smartphone is all you need for automated calibration. Follow these setup parameters to achieve maximum smash radar and tracking precision.
1. Recommended Spatial Setup Parameters
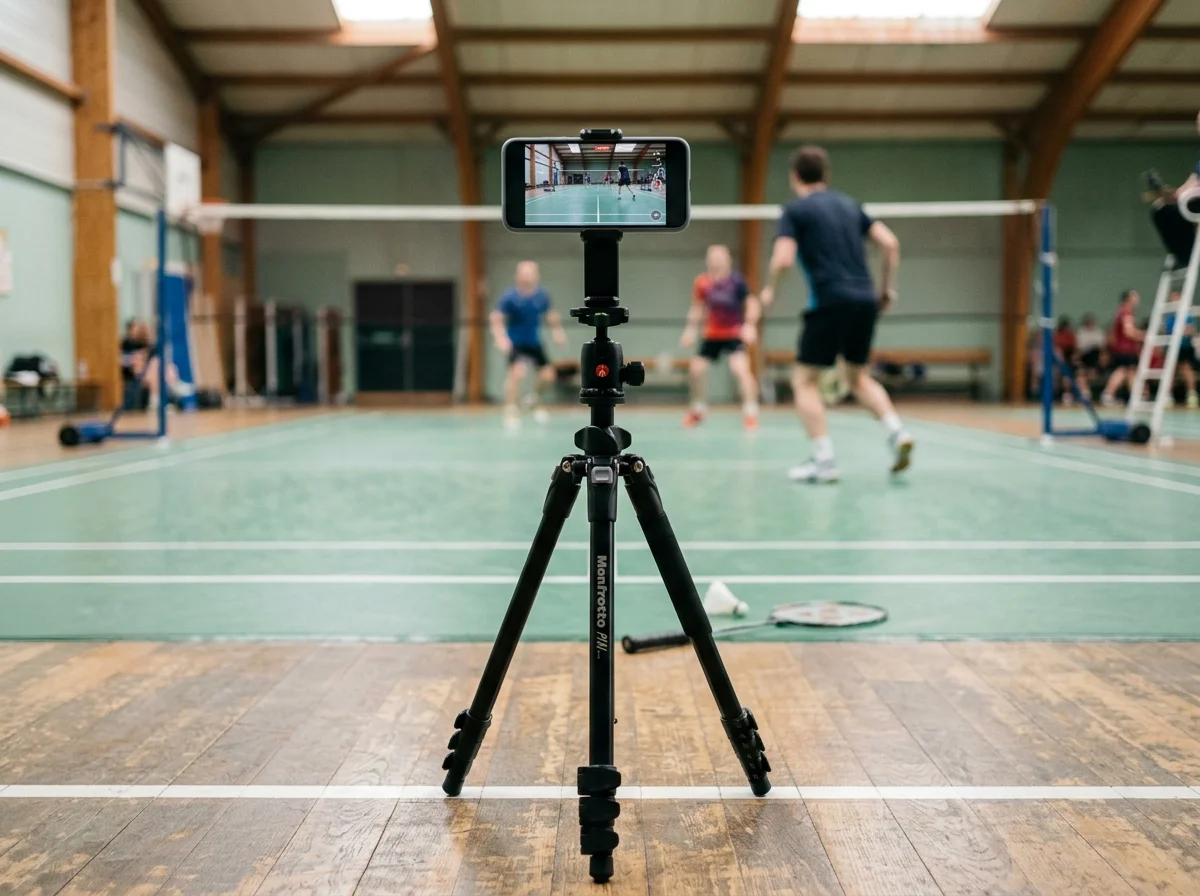
Any height over 0.5m works. 1~2m provides an optimal downward angle to avoid player overlap.
Place anywhere behind the baseline where the full court is framed cleanly.
Angle lens toward the top white net tape to naturally cover both court halves.
Ensure all 4 court corners and the net are visible within the camera frame.
Position Anywhere Behind Baseline — Adaptive Calibration
Mount your tripod behind the court baseline at height >0.5m (recommended 1~2m). Distance is flexible. Position centered or at a corner angle; the system automatically locks onto court lines and perspective geometry.
2. Pre-Match 4-Step Checklist
Wipe Camera Lens
Use a microfiber cloth to clean the main lens of glare, dust, and fingerprint smudges.
Check Court Boundary Lines
Ensure green or blue floor lines are visible without large equipment or towel obstructions.
Secure Tripod & Phone Clamp
Lock the tripod ballhead firmly to prevent vibrations during aggressive rallies.
Enable 60 FPS Recording
Select 60 FPS in recording settings to capture high-speed smash exit acceleration.
3. Recording & Analysis Tips
Ensure Battery Charge or Power Bank
Recording a match uses approx 15%-25% battery. Connect a portable power bank for multi-match sessions.
Compatible with Standard 1~2m Tripods
Any standard 1~2m photography tripod or light stand works seamlessly without custom hardware.
Reserve Local Phone Storage
Keep 3GB-5GB of free storage on your device for smooth video buffering before cloud upload.